


Advanced Skills: Winter Ice Climbing Skills – Part 1
New climbers tackling steep ice often abandon fundamental movement principles learned in rock climbing—balance, precise footwork, and weight transfer—in favor of brute-force tactics: swinging ice axes wildly and kicking crampons aggressively.
While this approach may work on short, low-angle ice, steeper or variable conditions quickly expose its inefficiency. Mastering technique is critical to conserving energy and succeeding on challenging routes.
I. Four Core Elements of Ice Climbing Technique
The foundation of steep ice climbing lies in front-pointing, a technique built on four integrated components:
1. Crampon Placement
- Engage front points at a slight downward angle (5 – 10°) for secure penetration.
- Avoid over-kicking to preserve ice integrity and reduce fatigue.
2. Ice Tool Placement
- Strike vertically with wrist flicking to seat picks cleanly.
- Test placements gently before committing weight.
3. Center of Mass Control
- Keep hips close to the ice to minimize leverage strain.
- Maintain a “stacked” posture: shoulders over hips, hips over feet.
4. Weight Transfer
- Shift momentum smoothly through hip and leg coordination.
- Avoid static hangs; prioritize dynamic movement.
These elements rely on ABC Principles:
- Agility: Adjust body position swiftly for brittle ice, bulges, or features.
- Balance: Distribute weight evenly between tools and feet to prevent over-gripping.
- Coordination: Synchronize strength, flexibility, and rhythm for fluid motion.
Beginners often struggle with “ice sense”—interpreting feedback from tools and crampons. Key to progress is learning to distinguish secure placements (solid “thunk” sounds) from poor ones (hollow “clangs”), while adjusting body position dynamically.
II. The Triangle Position: Foundation of Efficiency
The Triangle Position forms the biomechanical anchor for efficient movement. By aligning tools and crampons into a stable triangle with your center of mass (CM) near its apex, you prevent barn-dooring (sideways pivoting) on steep terrain.
Step-by-Step Execution:
- Starting Stance:
- Feet shoulder-width apart, knees flexed.
- Hinge hips slightly forward to load crampons evenly.
2. Tool Placement:
- Place tools vertically staggered (20 – 30 cm apart) within a “beach ball-sized” zone above your head.
- Grip handles lightly to reduce forearm pump.
3. Ascent Sequence:
- Hang straight-armed from the higher tool; draw feet together beneath it.
- Step up incrementally until shoulders align with the lower tool.
- Bridge feet outward (wider than shoulders), aligning CM vertically under the higher tool.
- Rehinge hips forward to reload crampons.
4. Tool Reset:
- Remove the lower tool and replant it above the higher one.
- Repeat the cycle.
III. Adapting to Variable Conditions
While the Triangle Position provides a baseline, adaptability is key:
- Brittle Ice: Use delicate taps for placements; minimize swing force.
- Plastic Ice: Drive tools decisively; exploit deep, secure placements.
- Featured Terrain (e.g., pillars, mushrooms): Shorten steps; use stemming for stability.
- Overhangs: Engage heel spurs and modify CM positioning.
Pro Tip: Drill the core movement pattern on moderate ice before tackling mixed or technical routes. Refining muscle memory ensures confident adaptation to unpredictable conditions.
Notes:
- Figures 1 & 2 illustrate the static/dynamic phases of the Triangle Position. Pair visual aids with instructor feedback for accelerated learning.
- Avoid hyperextending elbows during hangs to prevent tendon strain.
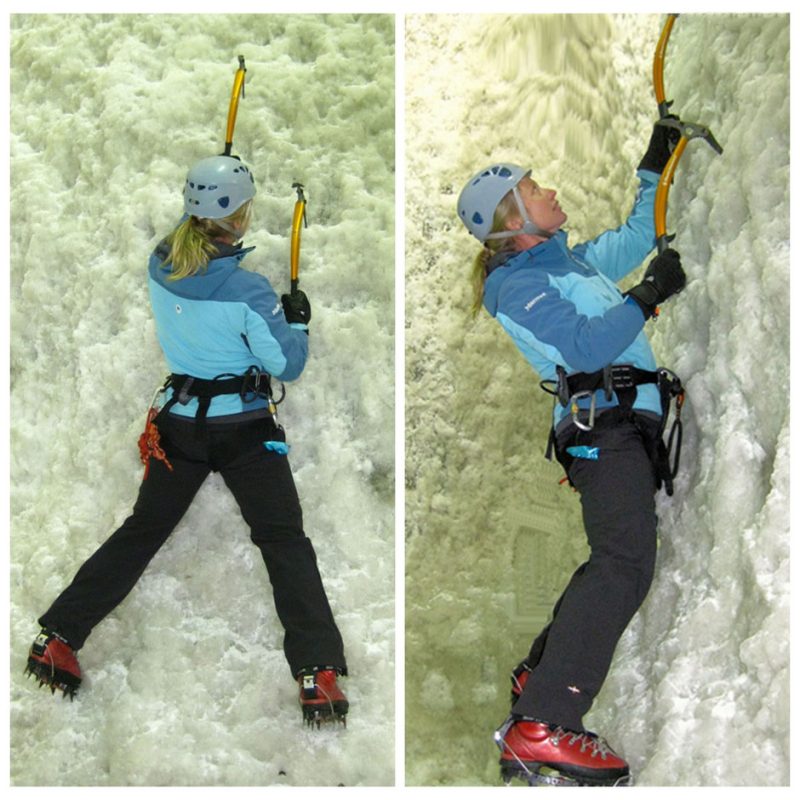
Figure 1 – Static Triangle Position
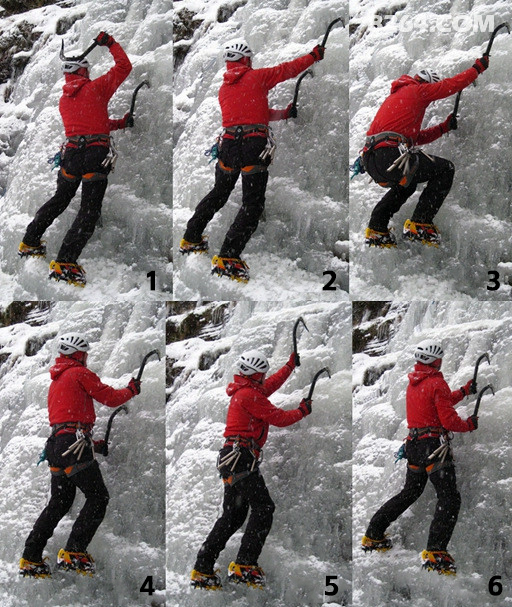
Figure 2 – Detailed Movement Tutorial