


How to Maximize Your Home Climbing Board: The Ultimate Setup & Training Guide
A home climbing board (especially a smaller, steeper one) is an excellent tool for building strength, power, and technique. This guide aims to help you optimize the setup and use of your home board, transforming it into an efficient and long-lasting training partner.
Part 1: Setting Up Your Board Thoughtfully
Successful home board training starts with a smart setup. These key steps ensure your board effectively serves your goals.
1. Define Your Training Goals
- First, identify your primary training focus: Is it maximum strength/power (short sequences of limit moves)? Or endurance/technique (longer sequences)?
- Your goals will dictate hold types, setting density, and training methods. Home boards are typically best suited for strength and power training.
- Goals may change over time, so maintaining setup flexibility is crucial.
2. Selecting Holds Scientifically
- Essential Basics: Have a set of large “jugs” for warming up.
- Ideal for Strength/Power Boards: Wooden holds are the preferred choice. They protect your skin, allow for more repetitions, and force you to grip harder and maintain tension.
- Avoiding Injury: Be cautious with irregularly shaped holds that could cause uneven finger loading (especially during repetitive training).
- Diversity is Key: Even when focusing on a specific grip type (e.g., full crimp), mix in various hold types (pockets, slopers, pinches, crimps, underclings, etc.) to prevent overuse injuries from repetitive stress patterns.
- DIY Value: Homemade wooden holds are cost-effective, offer unique shapes, and can even mimic specific project holds (prioritize safety).
3. Utilizing Hold Orientation and Layout Strategically
- Think Outside the Box: Don’t install all holds “upright.” Experiment by rotating slopers for Gastons (side pulls), or using jugs as underclings.
- Set Incrementally: Don’t bolt all holds at once. Prioritize placing interesting or inspiring shapes and try linking them.
- Grid-Based Thinking: Imagine a grid over your board. Vary hold types in each zone (e.g., slopers, small edges, underclings, side pulls, jugs, pinches, pockets) and incorporate footholds.
- Maintain Freshness: If you have ample holds, reserve some to add later, rotating them periodically to avoid monotony.
4. Handling Footholds Wisely
- Advantage of Dedicated Footholds: Strongly recommended: install small screw-on dedicated footholds. This:
- Forces more precise footwork, enhancing core control and body tension.
- Prevents rubber residue from handholds contaminating shoe soles, and shoe dirt/grit contaminating handholds.
- Stops your eyes from instinctively targeting large handholds, reducing the training stimulus.
- Alternative: If no dedicated footholds, mount small jugs upside-down (worse feel, but similar effect to small footholds).
- Establish Rules: Define foothold usage rules clearly (e.g., “feet follow hands,” “any foothold,” or designated zones).
5. Creating a Problem Documentation System
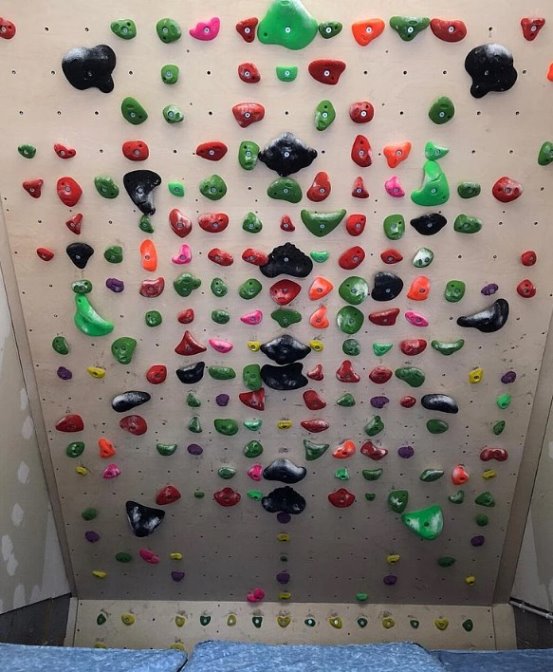
- Grid Method (T-Nut Boards): Label the board edges with letters and numbers (e.g., A1, B2) to create grid coordinates (like Battleship). Use an app or notebook to record problem sequences easily.
- Name Labeling Method (Screw-On Boards): Use a marker pen to write names directly beside holds (or on blank space above). Tape/labels work but can get messy on dense boards.
- Purpose: Facilitates problem recreation, sharing, and progress tracking.
6. Maintenance and Environment Management
- Cleaning: Keep a brush and chalk handy. Clean resin holds regularly (maintains friction, improves training experience). Wooden holds benefit from moderate chalk use and specialized oils to enhance “tackiness.”
- Environmental Control:
- Mind Humidity: Damp environments (outdoors, basements, garages) risk mold. Consider using a dehumidifier or fan.
- Ventilation: Ensure good air circulation.
- Comfort Equipment: Have speakers for training music, and a chair/couch for resting.
- Additional Tools: Use a whiteboard to log attempts, rules, or motivational quotes.
Part 2: Using Your Board Effectively
Once set up, the key is using your board safely, efficiently, and consistently for training.
1. Prioritize Thorough Warm-Ups
- Home Environment Risk: Proximity to bed/couch makes skipping warm-ups easier. Steep home boards place immense stress on unprepared bodies.
- Warm-Up Routine:
- Off-Board Warm-Up: Raise heart rate, perform dynamic stretches (focus on arm circles, shoulder rotations, wrist mobility, finger open/close).
- On-Board Warm-Up: Perform gentle hangs and pull-ups on the board.
- Gradually Increase Intensity: Start with “jug ladders,” progressively replacing holds to increase difficulty. Create 5 simple but varied boulder problems as a consistent warm-up starting point to assess your state and build stability.
- Patience: Adapting to small holds and strenuous moves takes time. Warm-ups may feel longer than at the gym.
2. Diversify Training Moves and Problems
- Prevent Boredom & Overuse: Regularly vary the grip focus and movement style in your training.
- Mix Movement Styles: While boards are often associated with dynamic, face-on climbing, blend static and dynamic movements to engage different muscle fibers.
- Incorporate Fun Techniques: Set “fun” problems involving knee bars, toe hooks, or foot-first sequences to boost motivation (ensure crash pad safety!).
- Practice Route Reading: Quickly identify interesting sequences, predicting body positions and difficulty.
- Establish Benchmark Problems: Set classic or test problems as long-term progress markers.
3. Leverage Virtual Interaction for Motivation
- Friend Problem Challenges:
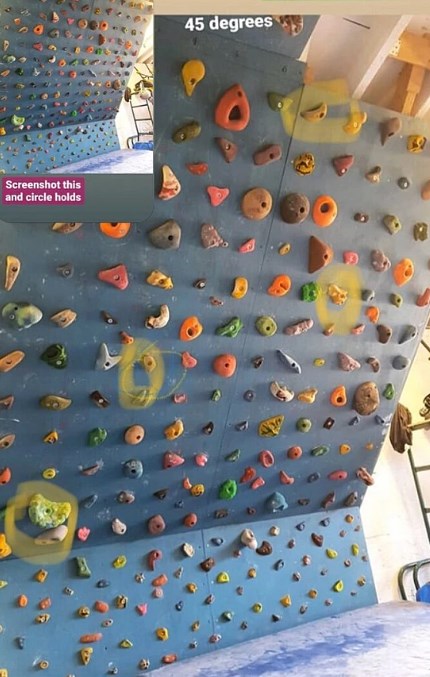
- Send a board photo to friends; ask them to design problems using phone editing tools to circle holds.
- Use Instagram Stories: Post a board photo asking for problems; fans screenshot and mark holds, then send back.
- Gain unexpected sequences, challenge weaknesses (e.g., static climbers get dynamic problems), and expand your movement library.
- Reminder: Ask setters to specify foothold rules!
- Virtual Board Sessions (Zoom, etc.): Organize online sessions with friends who have home boards. A virtual audience provides motivation and social interaction, mimicking the gym atmosphere.
4. Prioritize Training Safety and Recovery
- Acknowledge Intensity: Steep board training is extremely intense and can be addictive, especially initially.
- Implement a Plan:
- Set weekly session limits (frequency and duration).
- Schedule mandatory rest days! Allow full recovery (especially fingers, shoulders, back).
- Progress Gradually: Slowly increase training frequency and duration only as your body adapts. Be extra cautious when starting board training.
- Listen to Your Body: Pay close attention to how your fingers, shoulders, and back feel after sessions. Never force training before full recovery.
- Navigate the Adaptation Phase: Feeling overwhelmed or performing poorly in the first few weeks is normal. After the initial “honeymoon phase” fades, maintain motivation by changing moves, getting problems set by others, etc.
- Safety First: Always ensure the landing zone (crash pads) is safe and secure, especially during dynamic or unusual moves.